Links to the different sections of this website are at the top of the page. Links to the individual pages in the coin information section are below. Click on the orange text to move to a page in this section.
Hybrid Dies
The sinking of the dies required they undergo multiple (probably three) cycles of pressing with the punch, annealing (heating the die) to soften the die, and slow cooling. Since multiple punches were available, sometimes the diesinkers used different punches to accomplish the iterations of pressing on a single die. If the punches had the same obverse design, then the differences between them were usually indistinguishible. In cases where the diesinkers used punches with different obverse designs to sink a single die, the differences between the two obverse designs left visible reminders of the different punches.
Obverse 1A over Obverse 1
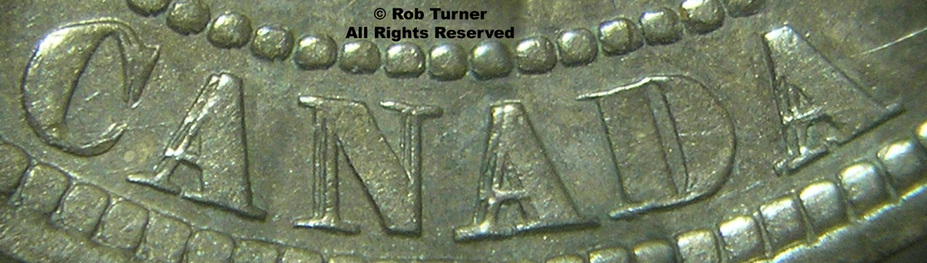
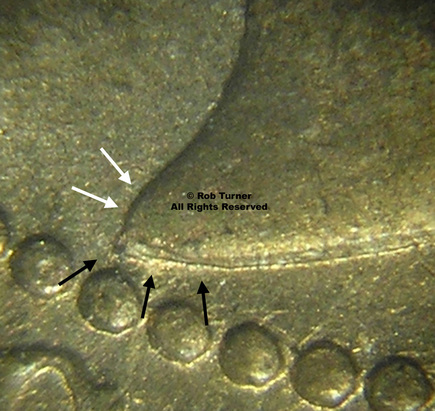
Numerous known dies, used to mint both 1881H and 1882H cents, were sunk using both an obverse 1A punch and an obverse 1 punch. On these dies, the effigy exhibited the smooth rounded chin indicative of both obverses 1A and 1. The top jewel of the tiara stopped short of the nearest bead, also a feature of both the obverse 1A and 1 designs. All these dies showed the rounded truncation tip of obverse 1A (see white arrows below) and the pointed trucation tip of obverse 1 (black arrows).
 |
 |
Obverse 2 over Obverse 1
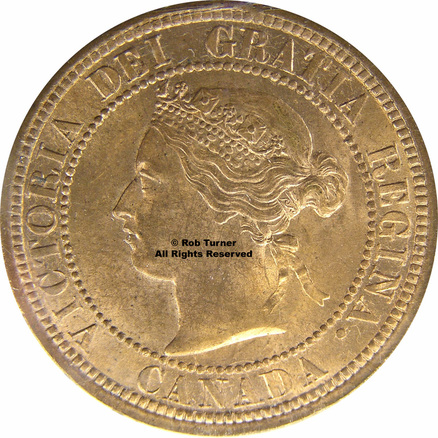
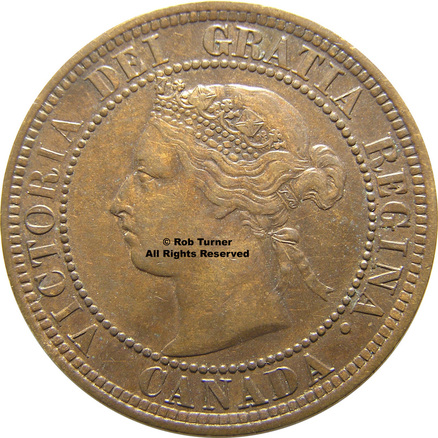
Three known dies, all used to mint 1882H cents, were sunk using both an obverse 1 punch and an obverse 2 punch. On all three of these dies, the effigy exhibited the smooth rounded chin indicative of obverse 1. The large top jewel of the tiara covered a portion of the nearest bead, a feature of the obverse 2 design. All these dies showed the larger lower left effigy truncation of obverse 2.
 |
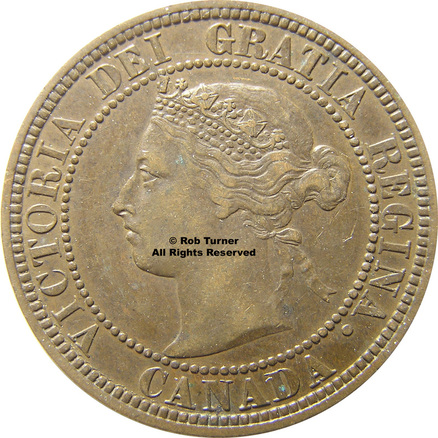 |
1882H Obverse 2 over Obverse 1This obverse die shows no visible punch doubling. A die crack from the rim through the main stem of the letter "C" in VICTORIA provides the best marker for this die. Of the three known 1882H obverse 2 over 1 dies, this die is by far the most common.
|
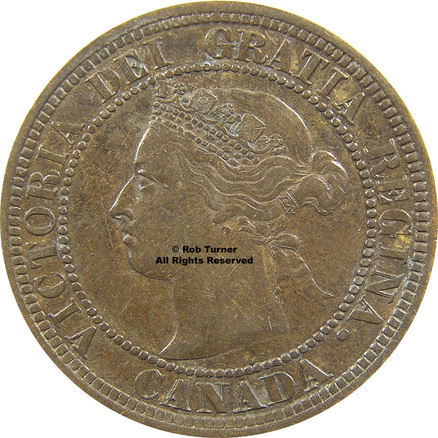
1882H Obverse 2 over Obverse 1This obverse die shows minor signs of punch doubling in the legends CANADA and REGINA. More dramatically, it also displays very visible doubling of the rim denticles from the "C" in VICTORIA to the "N" in CANADA. This die is considerably scarcer than the obverse 2 over 1 die shown to the left.
|
 |
1882H Double Die Obverse
|